Tag and Track
NOTA BENE:
The following applies to a home collection. Similar tools and methods are used when colleting wild orchids but we do not recommend to take orchids from the wild, unless you are part of an official research initiative. It is illegal to take orchids from the wild. If you already have wild orchids, the best thing you can probably do before they die (It is very difficult to keep wild orchids) is to give them a second life by contributing to science. To do this, get in touch with a research body, ideally the RUPP department of Botany managing the National Herbarium - and be ready to follow some of the basic steps below.
The best way to collect information about your orchids is to place tags and start your own little database system. It is not complicated but a bit of systematic approach is recommended

THE TOOLS:
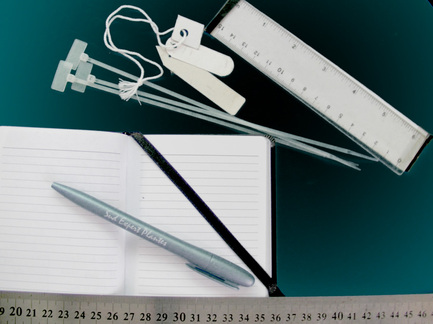
-Tags: you can use paper cardboard tags or plastic ones. I recommend plastic tags with permanent marker. Often the paper tags wear out in the sun or with regular watering.
-Collection book: this is an essential tool. In this book you can mark all your observations. I recommend a small book that you can easily fit in your pocket. Many people do not have computers and that is fine as long as you can keep the information in the book. You can collect information in the chronological order of your discoveries.
-A camera: be ready to take the pictures of the flowers and the plants. / Alternatively, if you are a good drawing artist, it is even better to draw - so you need a drawing pad and pencil
-A ruler (20 to 50cm) to measure the plant, the leaves and the flowers.
-Optional: a computer with your digital database -
Ok so now you are ready for the action....
1) NOTE AND TAG:
When you collect a new specimen, you immediately make a note of it in your book. In the book, you will logically give it the number that follows the previous find. You need to indicate if it is a dry specimen or a live one, where it comes from, the date of collection and describe the plant and its flowers, also give a basic description of its habitat . After noting the new number and its relevant information, place a tag on the specimen at once. On each tag, you can write your initials or the initials of the project and the number of the orchid
example: OC #1 = Orchid Cambodia Orchid # 1
On the tag, you do not need to add anymore than that - but if you have space, you can add the location of origin and date collected.
2) PHOTOS of the collection:
Taking picture of the orchids focus on: the flowers, the seeds, the leaves, the plant. Use the ruler to take photos of the flower and the leaves - you can always go back to these photos to check your notes.
The most important photo is the one of the flower - it is essential to see the flower to be able to determine the species.
If you already have a home collection, you can take photos of the orchids when they are blooming
If you are receiving new specimens, photograph them before placing them: once in place, the orchids grow and if they are close to other orchids, it makes it hard to take a picture of the plant alone with a clear background. So take pictures of the plants when you first get them. Also because when you first get the plant, it is most likely you will get it with flowers so take advantage and make the shots immediately.
3) NOTES and Observations:
This is the interesting part of the research. Now you have all the tags in place so each new event can be easily tracked:
example OC# 1 flowers in March, from the 15th to the 18th, flowers have a sweet smell in the morning....
Your book is the key tool and reference. But ideally if you have a computer, you can make an excell sheet and add the key indicators, starting with the tag number, genus, species, location and date of collection. Other important indicators will be: the litterature reference of the orchid (who first discovered it, when and where it is documented), the orchid habitat description...
The most important indicators for your orchids are: the name of the genus, and species, the date and location found
